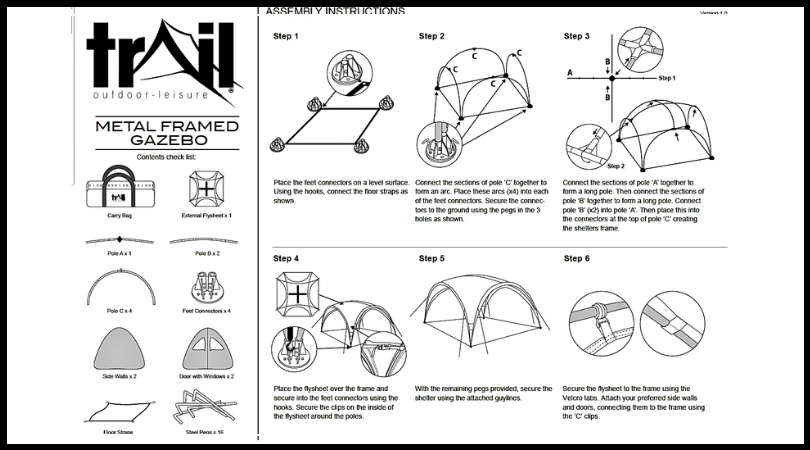
Event Shelter

Here are instructions on using our event shelter; how to put it up, take it down, and things to bear in mind to keep our volunteers and the public safe when using it. Note: these instructions are for use on grass.
The shelter is in three bags so that each one is not too heavy for one person to carry. One contains the flysheet, the sides, and the doors, one the roof-poles, feet, floor-straps, rubber mallet and pegs, and one the side-poles (image 1 below). The manufacturers instructions are sewn into the largest bag.
Check the ground for slope, lumps, hazards (broken glass etc) before selecting the best position and orientation for the shelter. Be aware of wind direction and strength. The shelter is not suitable for use in stormy conditions. Make sure the equipment does not create a trip hazard. You will need a minimum of three people to put it up safely.
The feet are slightly angled (image 2) and should be placed sloping towards the center of the shelter. The centre hole in the feet (image 3) should also be facing towards the centre.
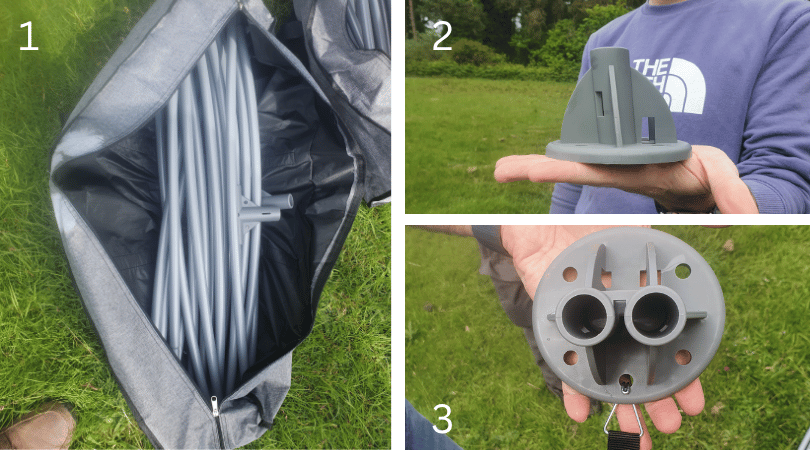
Place the first foot and secure with a minimum of two pegs, more if it is windy. Hook the floor-strap onto the centre hole (image 4). Place the other three feet so that the floor straps make a square (image 5).
Connect the side-poles together (four of these) and slot into the feet (image 6). Take care to support them so that they do not distort or bend Two people will be needed.
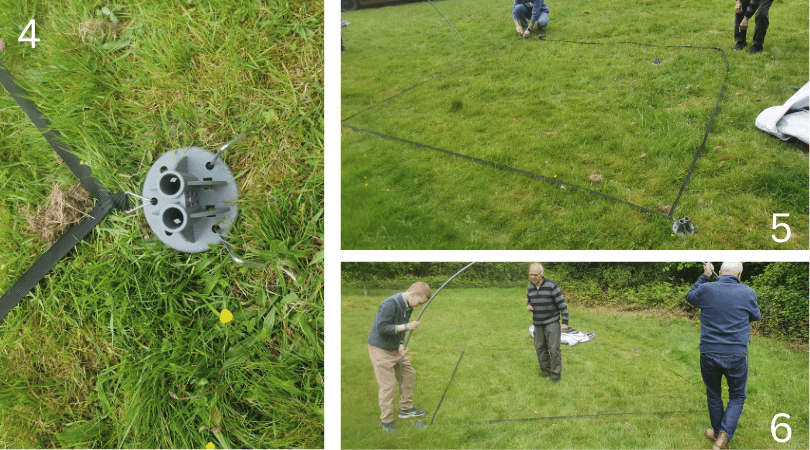
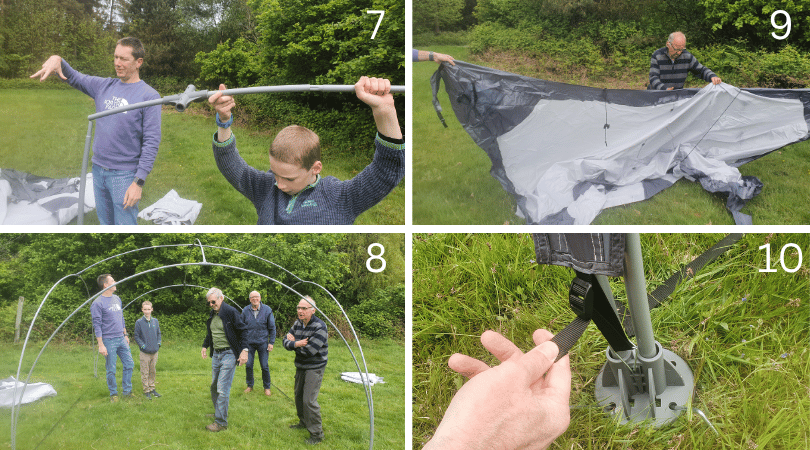
Connect the centre poles together (image 7) and slot into the side poles (image 8). The structure should now be self-supporting. Open the vents in the top of the fly-sheet before lifting it onto the structure.
Take note of the wind direction and lift the fly facing into the wind (image 9). You will need two people lifting the fly, and one in the centre of the structure to help it over the top. Hook the fly-sheet onto the feet (image 10).
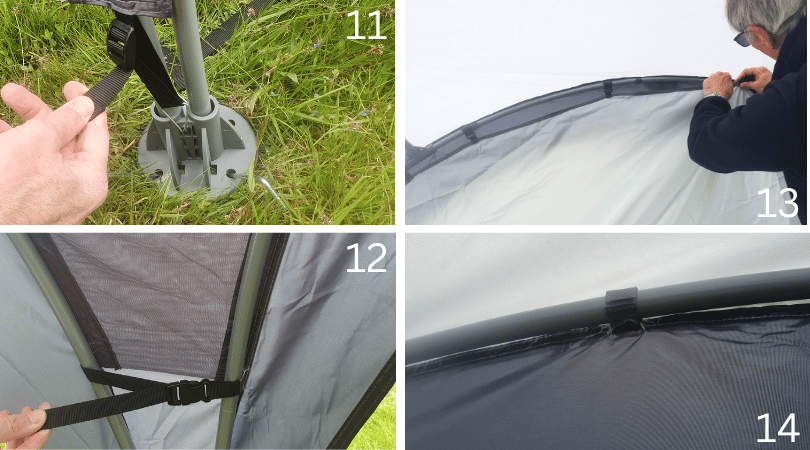
Adjust the straps on the fly if needed (image 11). Clip the fly round the poles and adjust the straps if needed on each leg (image 12). Use the velcro tabs to attach the fly to the poles.
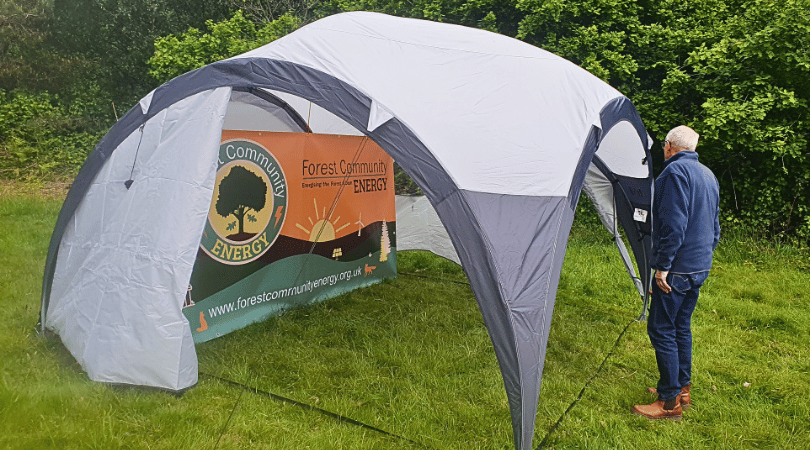
Think about the best location for the doors. If you are using the big banner the doors can be placed behind it to create a private/storage area. Think about which sides you need, this may vary depending on the weather and the location.
Clip the doors/sides onto the poles taking care not to catch your fingers (images 13 and 14). Use pegs to secure the base of the sides.
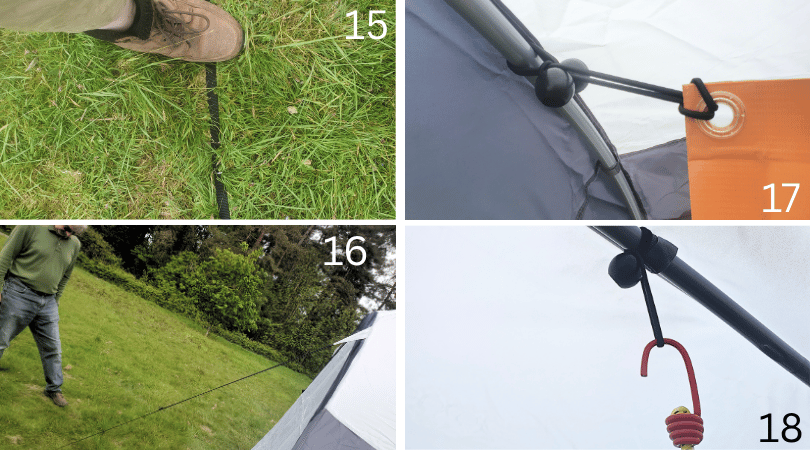
The floor straps represent a trip hazard. Either use pegs to secure it to the ground, or remove the straps once the shelter is up (image 15).
Think about which guy ropes to use. Make sure they do not create a trip hazard, and do not pull on the fly-sheet in a way that might damage the shelter (image 16). Use pegs at 45 degrees to the ground, and the guy-rope slider to create the right tension. Make sure the guy-lines are visible (using hazard tape, ribbon, or similar). Loop unused guy-ropes up inside the shelter.
If you are using the big banner (1.5m x 3.0m) secure the top corner eyelets to the poles using the elastic bobbles (image 17) and the centre eyelet to an elastic bobble on the roof pole using a bungee (image 18). Use pegs to secure the base.
Place the peg bag, rubber mallet, and any unused equipment into the bags and place in a secure location. Double check that nothing has been left out.
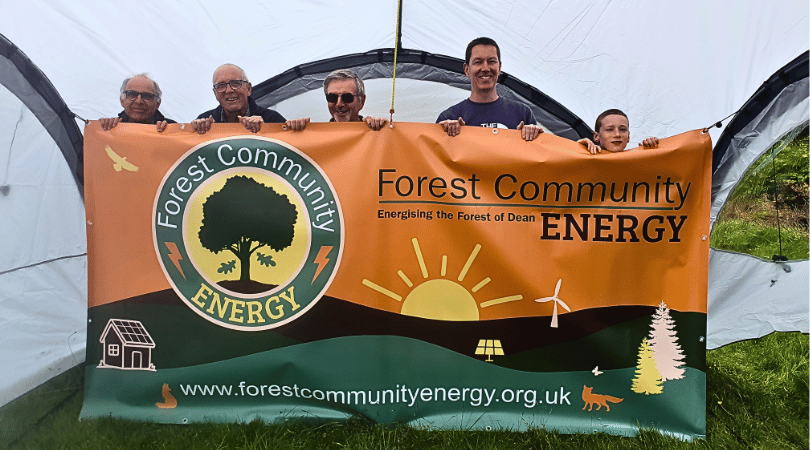
Have a great event!
When taking the shelter down be aware of the wind conditions and the safety of other people in the area. Make sure the shelter is empty of kit. Take down and roll-up the banner (if used) with the printed face on the inside and place it back in it's tube with the elastic bobbles and the bungeee.
Use the peg-puller to remove the tent pegs from the guy-lines, and hank the guy lines to keep them tidy (slide the slider to the top, wind around your hand, secure with a couple of turns round the middle). Put all the pegs into the peg-bag (after removing any mud if you can).
Detach the doors by removing the clips taking care not to pinch your fingers. Fold them up, and place then in their bag. Remove the floor straps (if still in place) and place them in their bag. Undo all the velcro tabs from the poles.
Unclip the fly-sheet straps from around the poles. Taking care to hold onto the fly-sheet unhook the sheet from the feet so that it can be removed facing into the wind. Carefully lift it off, lay it on the ground, fold it into a square-ish shape, and fold to fit into it's bag.
Remove the side poles from the feet and the roof-pole from the side-poles. Fold all the poles up. Put the side-poles all together in their bag and the roof-poles in the third bag with the floor straps. Remove the pegs from the feet and put them in the peg-bag. The feet, peg-bag, and mallet go back in the bag with the roof-poles.
Check the areas for litter and overlooked pegs!
Note: If the shelter is damp when it is packed away it must be hung up to dry as soon as possible. If anything has been damaged or broken during the event please let us know so repairs or replacements can be arranged.
If you have anything to add or change to improve these instructions do let us know.
